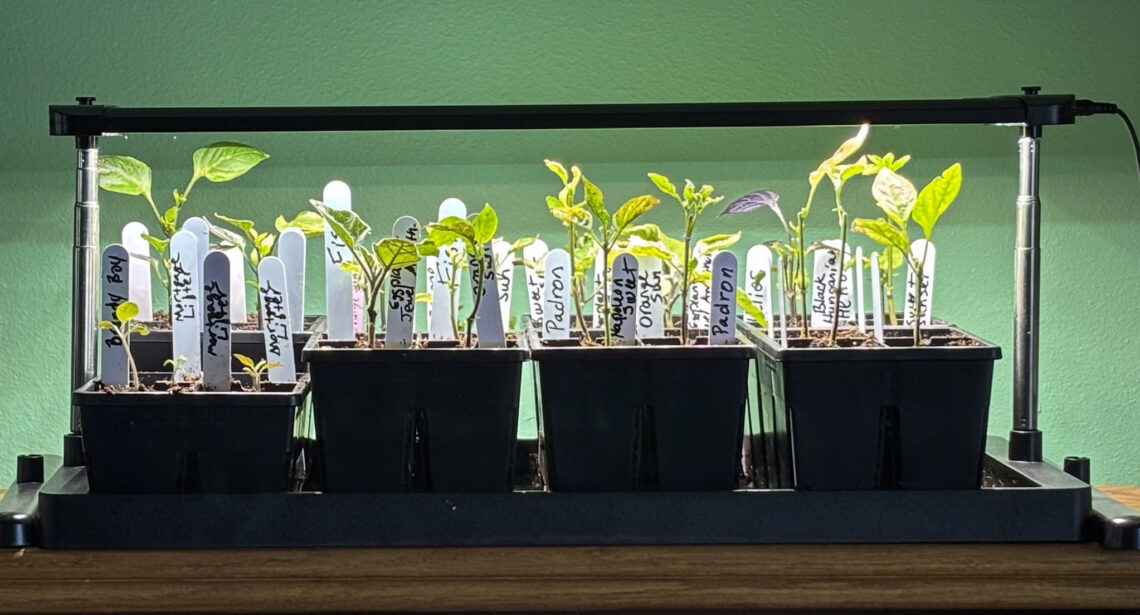
Okay, real talk. Let’s pretend it is February. There is snow on the ground. Your last frost date is May 30th, which feels approximately as far away as retirement. And your gardening feed is full of people posting pictures of their cute little seedlings, while you’re over here staring out the window at a frozen tundra (unless you are remembering 2026 when we barely saw a snowflake the whole winter!).
Heads up! This post contains affiliate links to Botanical Interests. I may earn a small commission if you buy through them — at no extra cost to you. I only ever recommend stuff I actually use.
Starting seeds indoors is hands-down the highest-impact skill you can develop as a cold-climate gardener. While I am a notorious recycler of pots, trays, and lights for starting my seeds. I’ve changed my tactics this year and purchased some more substantial and long-lasting trays. Now I can put them in some warmer areas of my house other than the basement where it is much cooler. Let’s dig in.
First, Why Bother?
Zone 4 gets roughly 90 to 120 frost-free days per year. That sounds like plenty until you look at the back of a tomato seed packet and see “80 days to maturity” actually refers to the number of days after you set out started plants.
In that case, it is either start your seeds indoors or buy all of them from the garden center. When starting your own seeds, you get 6 to 12 weeks of head start in your warm house, so your transplants go in the ground already sized up and ready to thrive — not struggling to catch up before fall frost shows up uninvited. If things go well, they should even be flowering when you put them in the ground. And starting your own seeds is the only way to try interesting varieties you’ll never find in your local garden center.
And honestly? Having a shelf full of tiny green seedlings growing under lights while it’s -10°F outside does something really good for your soul in the middle of a Zone 4 winter. That part doesn’t get talked about enough.
When to Start What: Your Zone 4 Seed Starting Calendar
Timing is where most beginners trip up. Start too early and you end up with four-foot tomato plants stuffed into little cells, begging to go outside while the ground is still frozen. Start too late and you’re right back to that short-season scramble. Here’s your cheat sheet, built around a May 30th last frost date:
FEBRUARY — The Slow Starters
- Onions and leeks: Start 10–12 weeks before transplant. They’re slow. They need the runway.
- Celery: Also 10–12 weeks. Needs steady warmth and moisture to germinate. Don’t rush it.
- Perennial flowers (Echinacea, Rudbeckia, Lavender): Start 8–12 weeks out if you want blooms in year one.
MARCH — The Busy Month
- Peppers: 8–10 weeks before last frost. They’re the slowpokes of the vegetable world and they love heat to germinate. A heat mat is your best friend here.
- Eggplant: Right alongside peppers, same timeline.
- Tomatoes: 6–8 weeks before last frost — so late March to early April for Zone 4.
- Broccoli, Cabbage, Cauliflower: 5–7 weeks before you want to get them outside.
- Snapdragons and slow annual flowers: Give these 8–10 weeks to bulk up before transplanting.
APRIL — The Quick Ones
- Zinnias: Only need 4–6 weeks indoors — seriously, don’t start them in February no matter how tempting. These are so fast, you can even consider sowing seeds in the garden after danger of frost.
- Marigolds: Same deal, 4–6 weeks is plenty.
- Basil: 4–6 weeks, but wait to transplant until nights are close to 50°F.
- Cucumbers and summer squash: 2–4 weeks only. They grow fast and hate having their roots disturbed.
The Setup: Gear That Actually Works
You don’t need a greenhouse or a fancy spare room to start seeds successfully. You need four things: light, warmth, good containers, and decent soil. Botanical Interests partnered with Epic Gardening to build a product line that covers all of it — here’s the breakdown:
- The Epic Seed Starting Heat Mat — Don’t Skip This One
Peppers, tomatoes, and eggplants need soil temps around 75–85°F to germinate reliably, and your house in late winter to early spring is probably not providing that. The Epic Seed Starting Heat Mat is energy-efficient, raises soil temperature by 10–20°F, and fits perfectly under their standard bottom tray. Heat mats are about timing. Seeds pop out of the soil 2-3 times faster with bottom heat than without.
True story: a heat mat can be the difference between 30% pepper germination and 90% pepper germination. It’s that impactful.
- Epic Seed Starting Pots — Made to Last
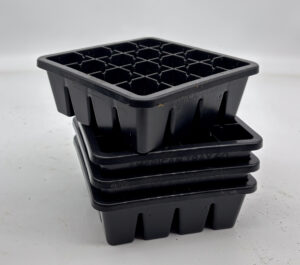
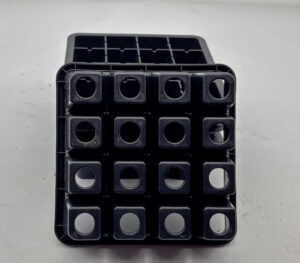
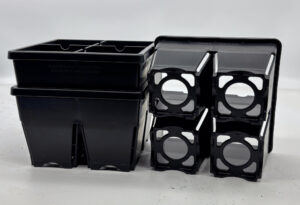
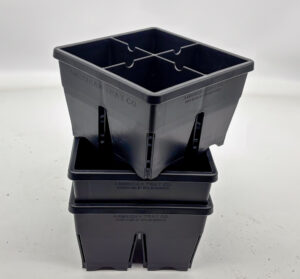
These are not the flimsy trays that crack the second week of March. Heavy plastic stands up to constant moving between the garage and the cold frame. I was tired of those crummy one use pot stuffer pots. They were way too easy to rip and collapse with my fragile seedlings inside. These trays are BPA-free, UV-resistant, made in the USA from recycled plastic, and built to be reused for years. The smart design includes air-pruning slots that prevent roots from getting tangled and circling — which means healthier root structure and a much easier transplanting experience (the only one without the air-pruning slots is the 16-cell version). This design has made a huge difference in my seedlings. Bonus: they have little finger holes in the bottom so you can push seedlings out cleanly instead of digging around in the cell and wrecking the roots. Lots of different sizes that fit perfectly in the Universal Tray which is just as strong and won’t bend when you pick it up full of potted seedlings.
- Epic Grow Light with Tray — The Game Changer
Here’s the honest truth about windowsills in Zone 4 in February: they’re not enough. Even your best south-facing window is delivering only a few hours of weak winter light per day. The result is leggy, spindly seedlings that look like they’re reaching desperately for the sun — because they are. Leggy seedlings never quite recover their vigor, even after transplanting.
The Epic Grow Light with Tray fixes this completely. It uses full-spectrum LEDs designed for plant growth, mounts at adjustable heights close to the canopy, has a built-in timer so you don’t have to remember to turn it on and off, and holds up to twelve 4-cell trays. It sits right on any surface in your house and looks tidy enough that your household won’t stage a protest. Run it 14–16 hours a day and your seedlings will be stocky, green, and genuinely happy.
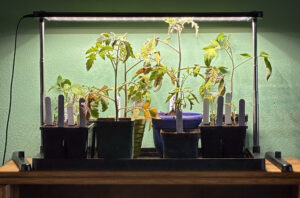
While the price is incredible on these handy grow lights that you can tuck away in your bathroom or your guest room, they are more fragile than I expected. Maybe they will fix that in the next design, but if you are careful with them, they are prefect. Especially if you don’t already have a dedicated room for seed growing.
- The Ultimate Seed Starting Kit — If You Just Want It All Done
Honestly, if you want to skip the “what goes with what” puzzle and just have a complete setup show up at your door, the Ultimate Seed Starting Kit is the move. It bundles the Epic 1020 Universal Bottom Tray, a 12-pack of 6-Cell Trays, the Heat Mat, and the full-size Grow Light together. Everything is designed to work together. It’s a great gift idea too — just saying.
Quick Tips Before You Dive In
- Use seed starting mix, not garden soil. Garden soil compacts in cells and can harbor pathogens. Seed starting mix is light, sterile, and drains the way it’s supposed to. I didn’t cover that here, but you should be able to get plenty of soil specifically for seed starting from your local hardware store. No need to order it online.
- Water from the bottom whenever you can. Fill the bottom tray with water and let the cells drink it up. Less splashing, less disease, happier seedlings.
- Label everything the moment seeds go in. You will absolutely convince yourself you’ll remember which cell is which. You won’t. Grab a marker now.
- Thin to one seedling per cell. Use scissors to snip the extras — don’t pull them out, which disturbs the keeper’s roots. One strong plant beats two crowded ones every time.
- Harden off for 7–10 days before transplanting. Your pampered indoor seedlings have never felt wind or real sun. Take a week to introduce them to the outdoors gradually, starting with an hour of shade and working up from there. In Zone 4, this typically runs from mid-May to around June 1st, but check the long-range forecast before choosing a planting date.
- Read the Botanical Interests seed packets. I mean it — they pack a surprising amount of genuinely useful growing info in there. Germination temps, spacing, depth, timing. It’s like a cheat sheet for every variety.
The Real Reason to Start Seeds in Zone 4
We’ve talked about the logistics, but let me tell you what seed starting is really about.
It’s about having access to literally hundreds of varieties you’ll never find at a garden center. It’s about the ridiculously satisfying moment when you spot the first tiny seed leaves breaking the soil surface on a dark February morning. It’s about knowing that every tomato, pepper, and zinnia in your garden started as a tiny seed that you coaxed into life on your countertop.
I wish it were about saving money, but I won’t lie. The time you save in buying plants from the garden center can’t be ignored. The money is probably a wash in the first year because of the seed starting supplies you need. After that the cost of seeds is A LOT less than started plants from the garden center. However, what’s been said already is absolutely true. The different varieties are really fun to test out and experiment with. What pushes things over the edge for us gardeners is satisfying that itch to get things growing. We can’t help it. Watch out, because it can be addictive!
Zone 4 winters are long, no question. But they’re also the season when you get to sit with a seed catalog, dream big, and plan the best garden you’ve ever grown. Start there. Start small if you want. Grab some seeds, a tray, a heat mat, and a grow light, and by May you’ll have more transplants than you know what to do with — and you’ll be handing them out to your neighbors like a very generous garden villain.


